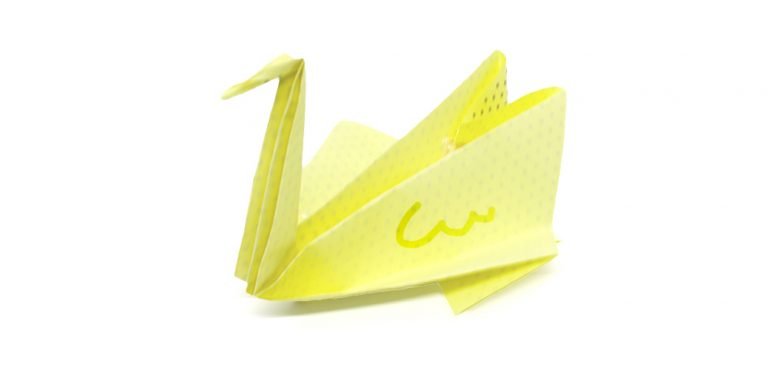
Introduction:
If you’re having difficulty making the traditional paper crane, this simple version of the origami crane may be a better paper activity for you. Great for kids and beginners, you only need to know the basic folds to make this bird origami.
For this instruction, use sturdy origami paper with a color on one side. That way, it would be easier to follow the step-by-step instruction. Also, the process is short so you can get familiar with all the steps after a few tries.
Sit back, follow the guide, and most importantly have fun as you fold your origami crane!
Diagonally Fold the Top and Bottom

For this easy origami crane, start with a square piece of origami paper. Face the colored side up and then fold the paper crosswise in half. Crease the paper well and unfold.
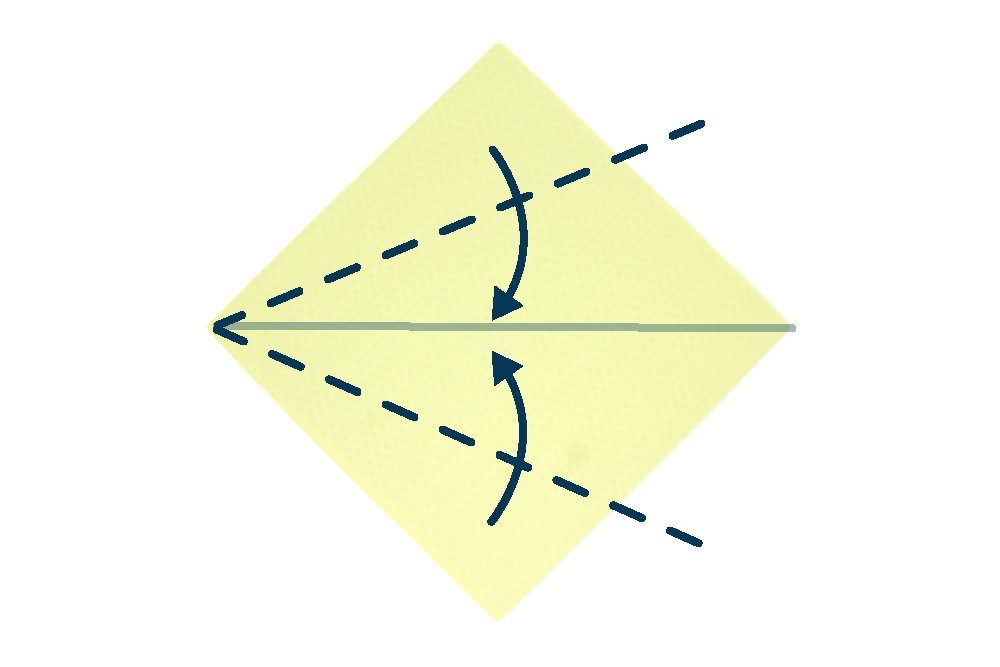
The next step is to fold the top and bottom corner to the center of the crease line. Fold the dashed lines for guidance.

Fold the top flap upwards as shown and then fold the bottom flap downwards as shown. Make sure to fold the top layer ONLY.
Diagonally Fold Again
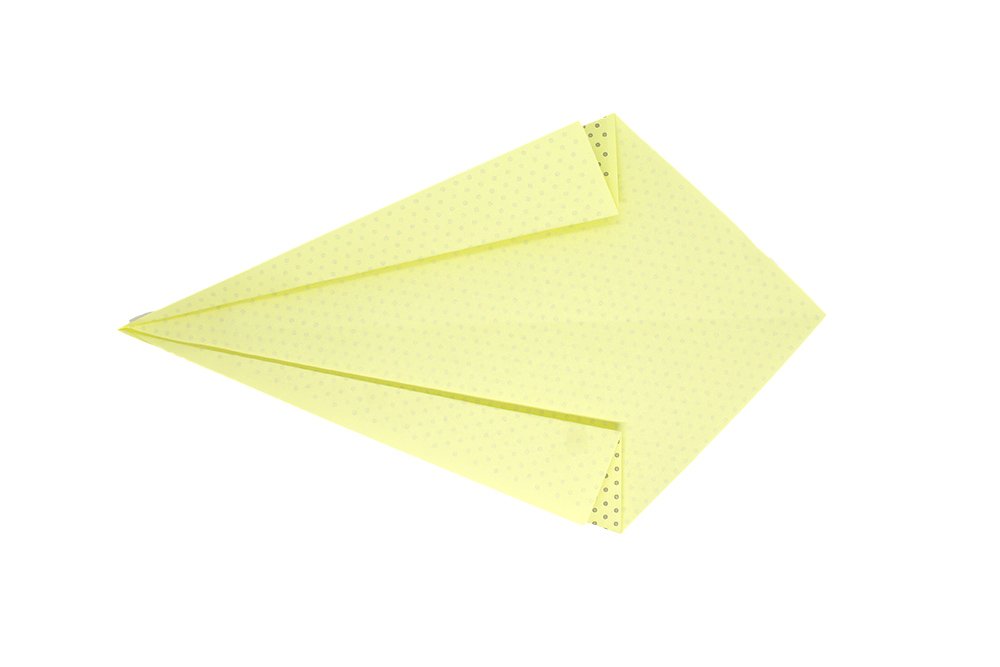
This is now what your origami should look like. Turn the origami crane to the other side.
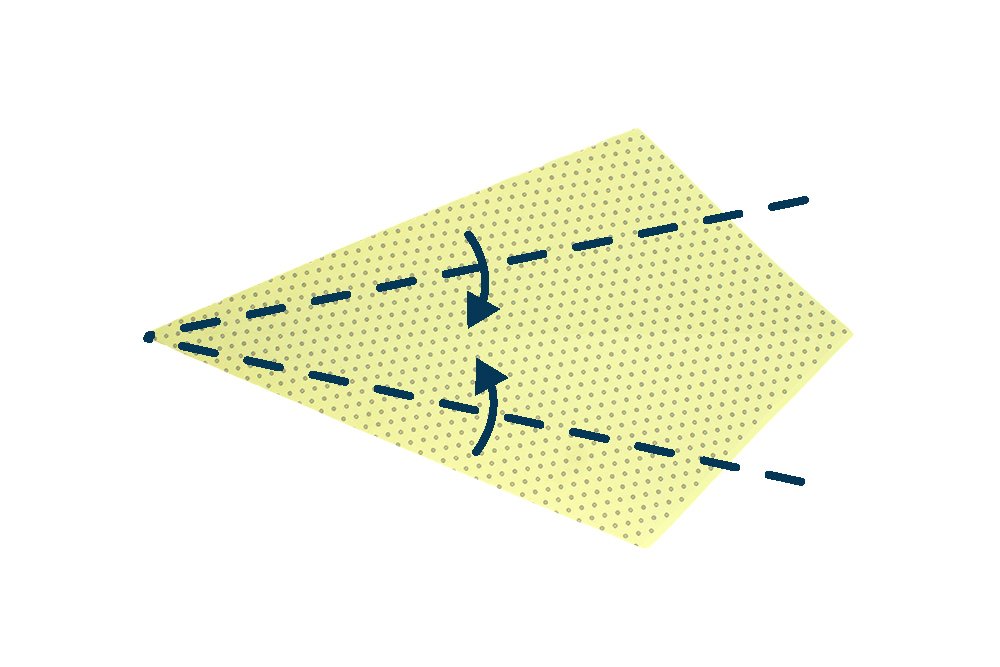
Bring the top and bottom corners to the center of the crease line. Follow the dashed line for guidance.

This is now what your origami should look like. Mountain fold the paper crosswise in half. To make a mountain fold, fold the paper away from you.
Make the Head of the Origami Crane

Make the origami crane’s long neck by folding the paper to the right as shown. Crease well and unfold.
Make an inside reverse fold using the crease line made in previous step as guidance. To make an inside reverse fold, pry open the top tip. Then push it down inwards to the center, then flatten.
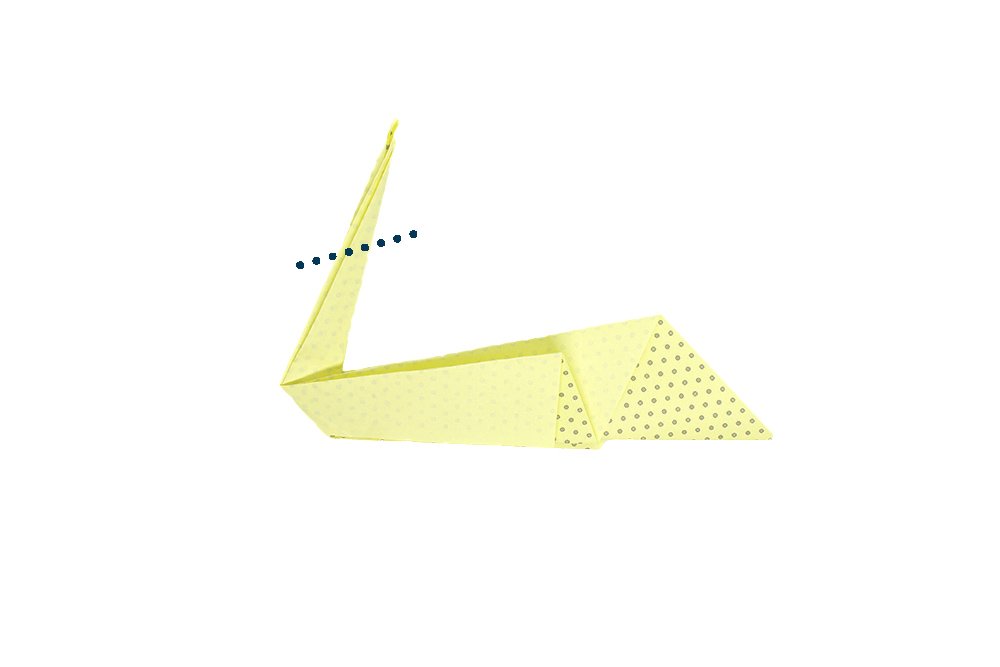
Form the beak of the crane by making another inside reverse fold on the origami paper.
Make the Tail
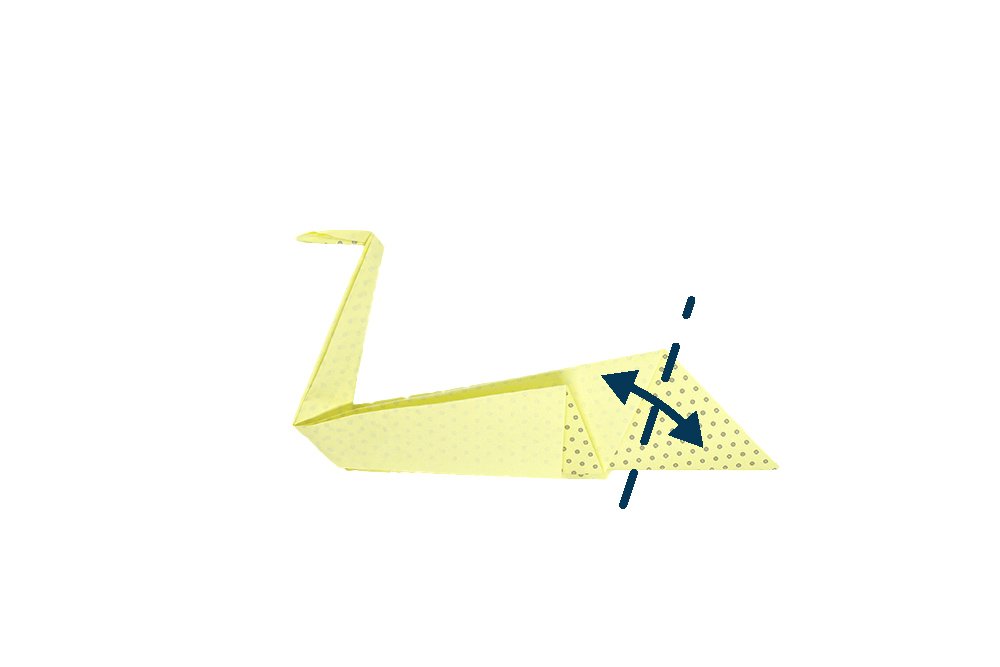
Fold the right corner to the left side as shown. Crease the paper well and unfold.
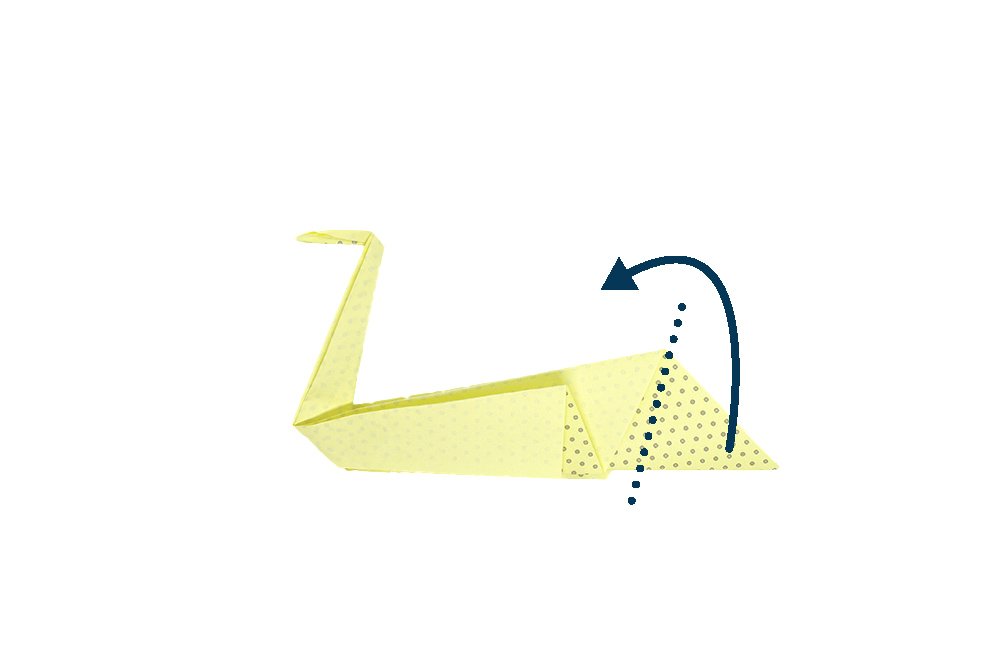
Make another inside reverse fold on the crease line (dotted line) made in previous step.
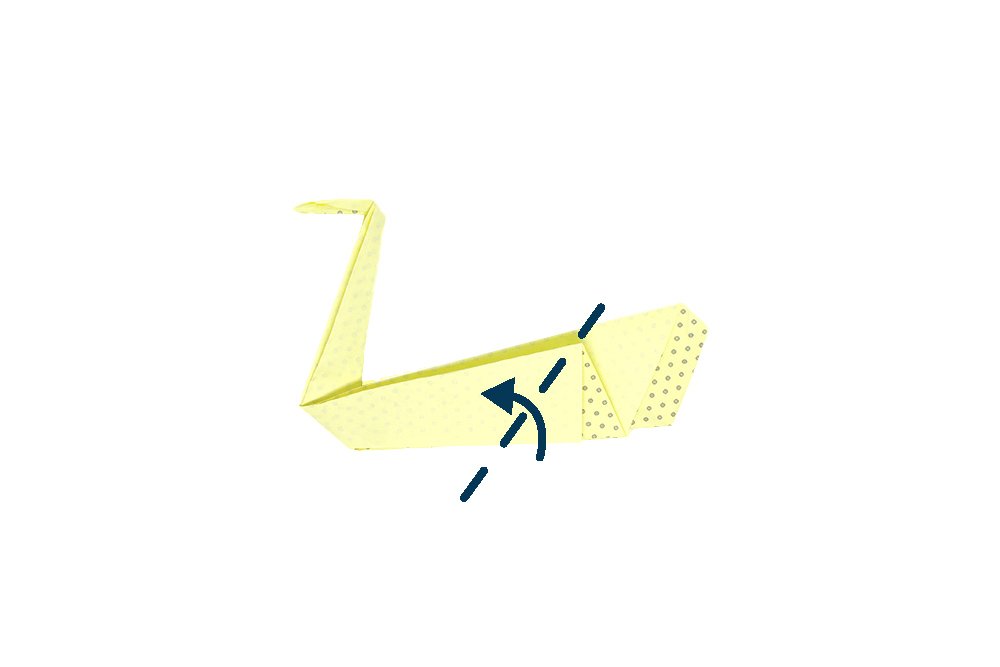
It now looks like a bird. Fold upwards the outer flap. Repeat the fold on the back side.
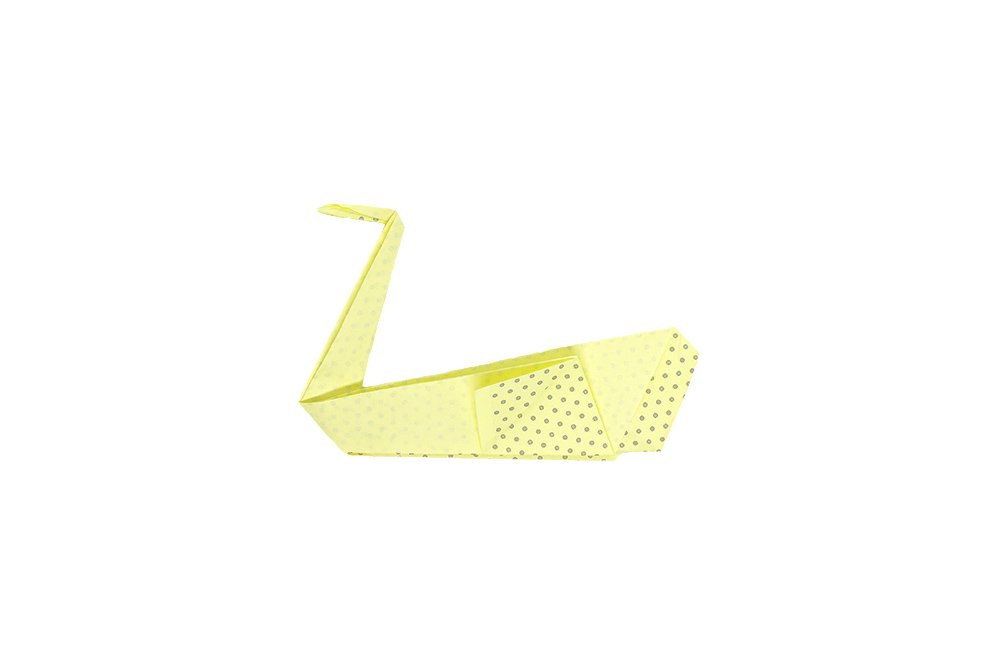
The crane is almost done! Spread the wings apart on both sides.
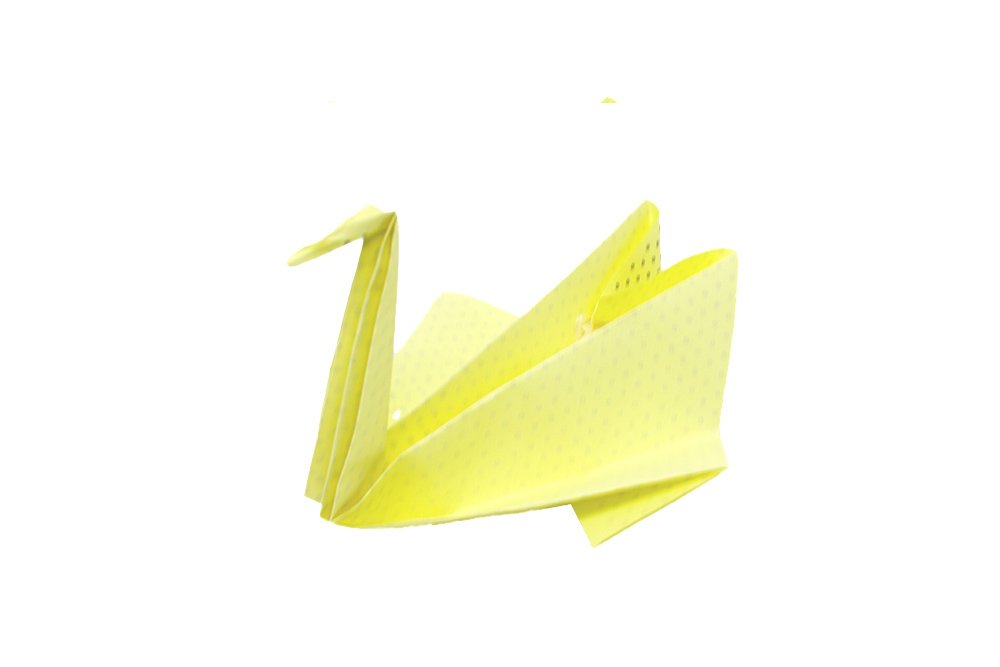
Your easy origami crane is done! It can stand on its own and would now make an awesome decoration. There are a variety of ways to make origami birds. You can check them out in our origami section.
Extra Tips
- Don't be discouraged if you make mistakes and when your paper gets unusable. Get another piece of paper and start over. You can do it.
- Make sure to follow the steps closely. But don't forget to have fun!
- Fold straight and apply enough pressure.

 5
5


