Introduction:
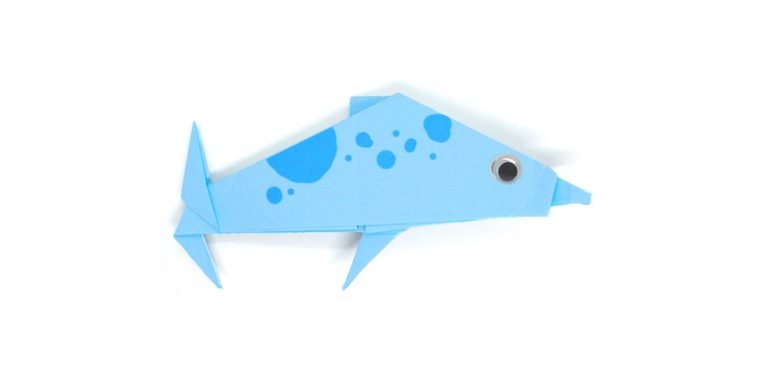
This dolphin origami is fairly easy to do as it doesn’t require that many complicated folds. A wonderful aquatic animal, this common dolphin is known for its amazing intelligence and bottlenose beak. By following this step-by-step tutorial, you can have your amazing sea friend!
One cool thing that you can do after you’ve folded your origami is to give it some details. A touch of color here or there, you decide! Make it your own and have fun coming up with your design.
This is a short guide and it’s almost intermediate level when it comes to difficulty. That said, reading this guide and making the origami dolphin would be a good idea for beginners. Hope you’ll enjoy it!
Make a waterbomb base
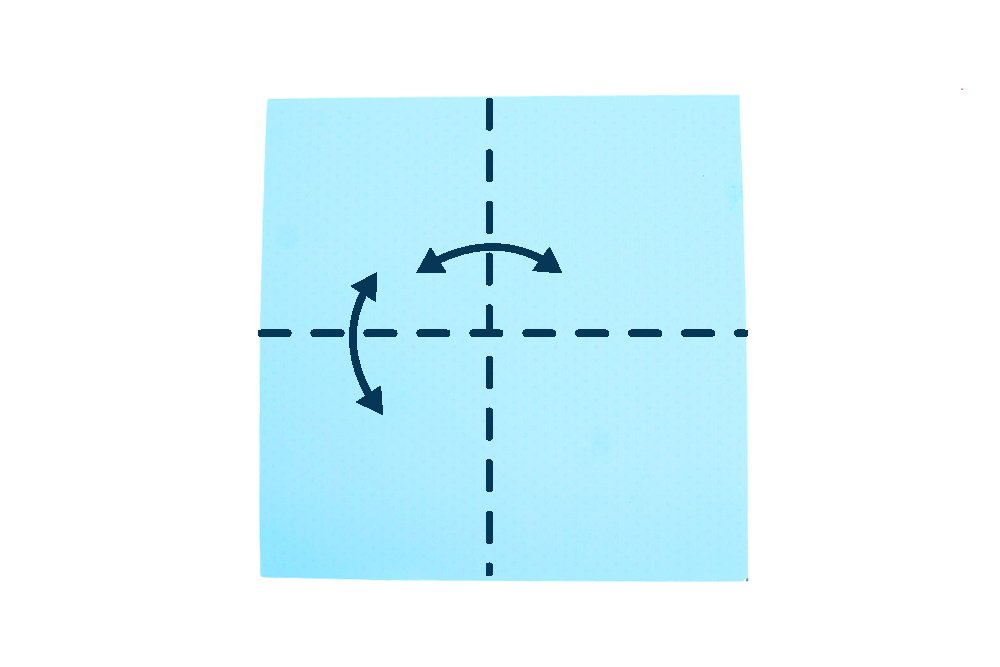
Use a square piece of origami paper to make this dolphin origami. Make a waterbomb base by folding the paper lengthwise and crosswise in half. Crease the paper well and unfold. Flip to the other side after.

Fold along the dashed lines diagonally as shown. Crease the origami paper well and unfold.

Push the right and left sides inwards. Keep pushing by following the arrows as shown. Fold the top middle part, right and left middle part, to the origami paper’s bottom part.

Squash the origami paper to flatten. The origami should look like a triangle.
Form the dorsal fin, head, and pleat of the origami dolphin
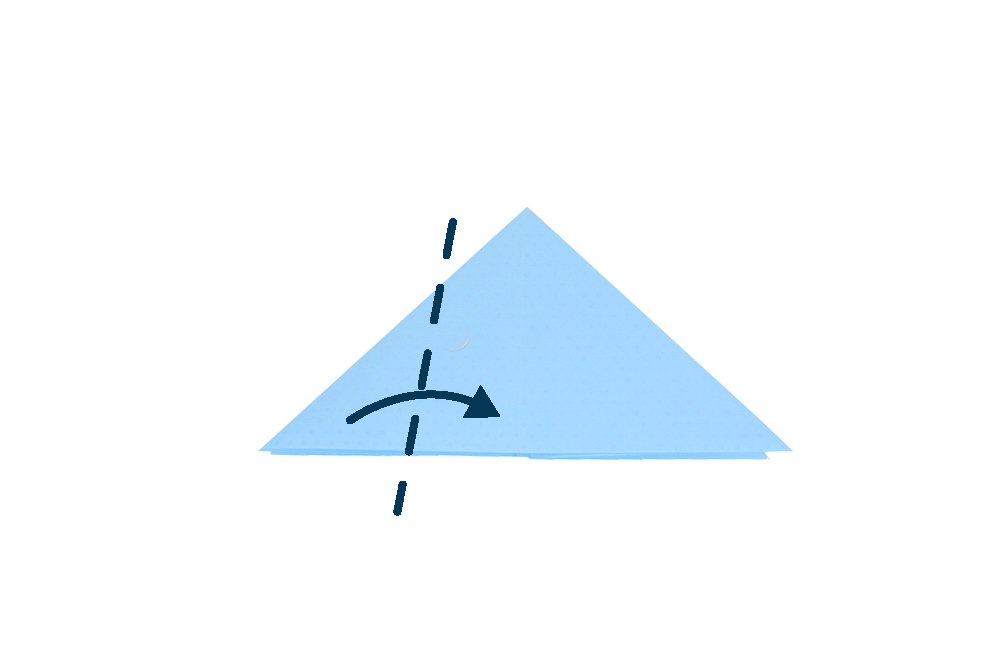
Fold the left corner of the origami paper to the right along the dashed line. Make sure to fold the top layer only.
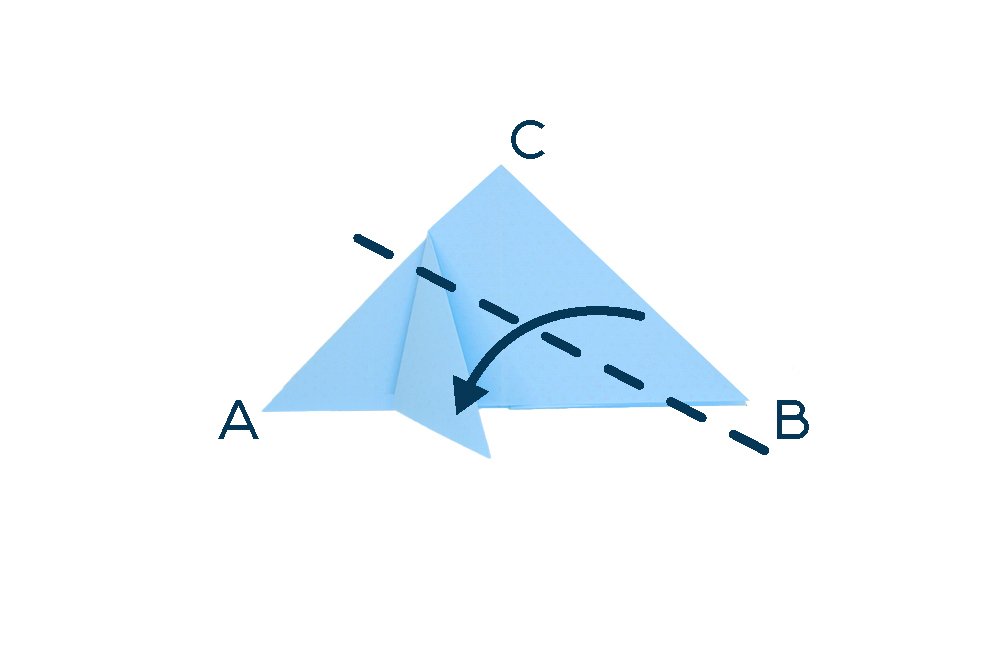
Shape the dolphin origami by folding side CB along the dashed line.
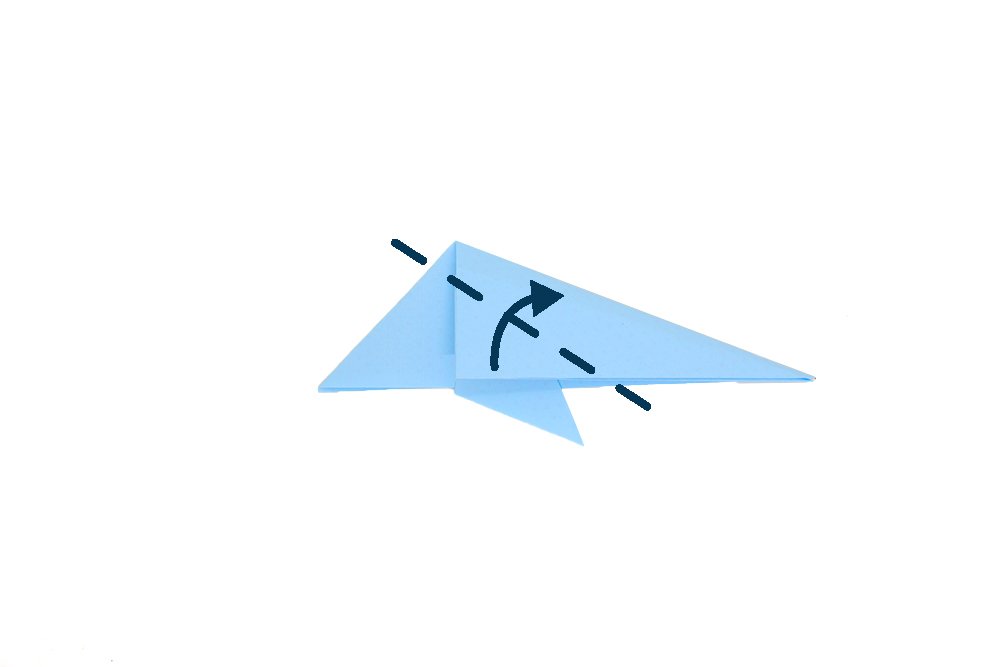
Form the dorsal fin of the dolphin origami by folding the top layer along the dashed line.
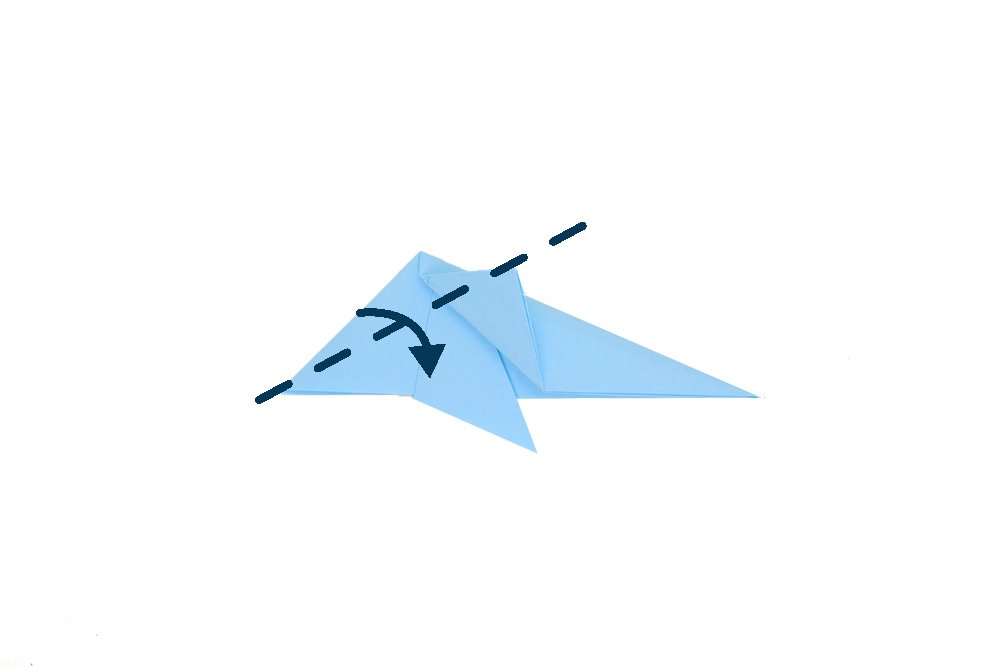
Form the head by folding the origami piece along the dashed line.
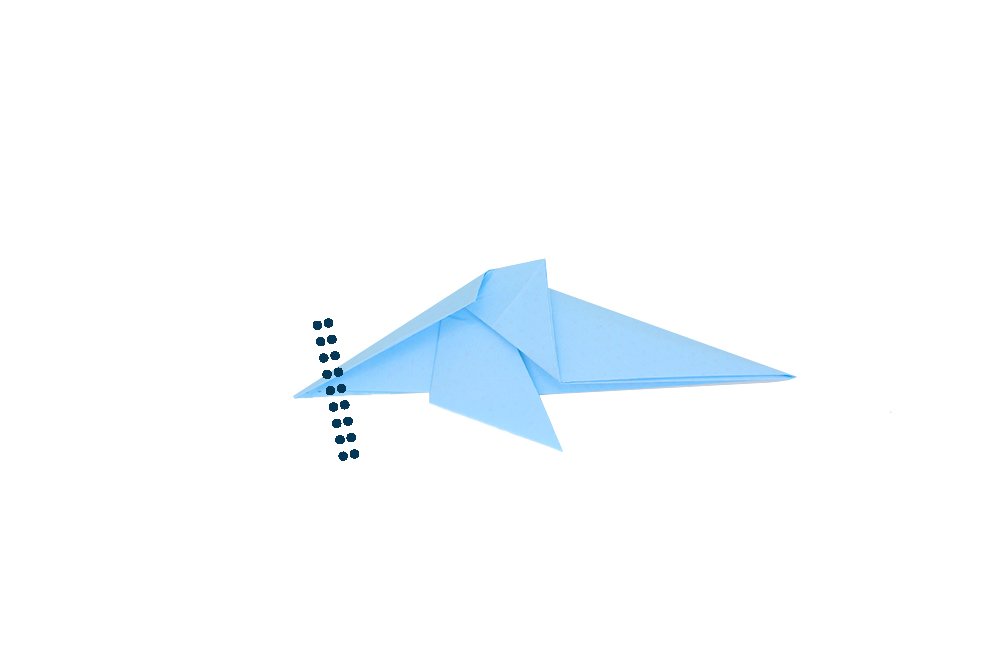
Make a pleat as shown to start forming the nose of the dolphin. To make the pleat, fold the left corner to the right side, fold a part of the back. Follow the dotted lines as shown.
Form the tail

Start forming the tail by doing an inside reverse fold on the right corner. To make an inside reverse fold, pry open the right tip. Then push it down inwards to the center, then flatten
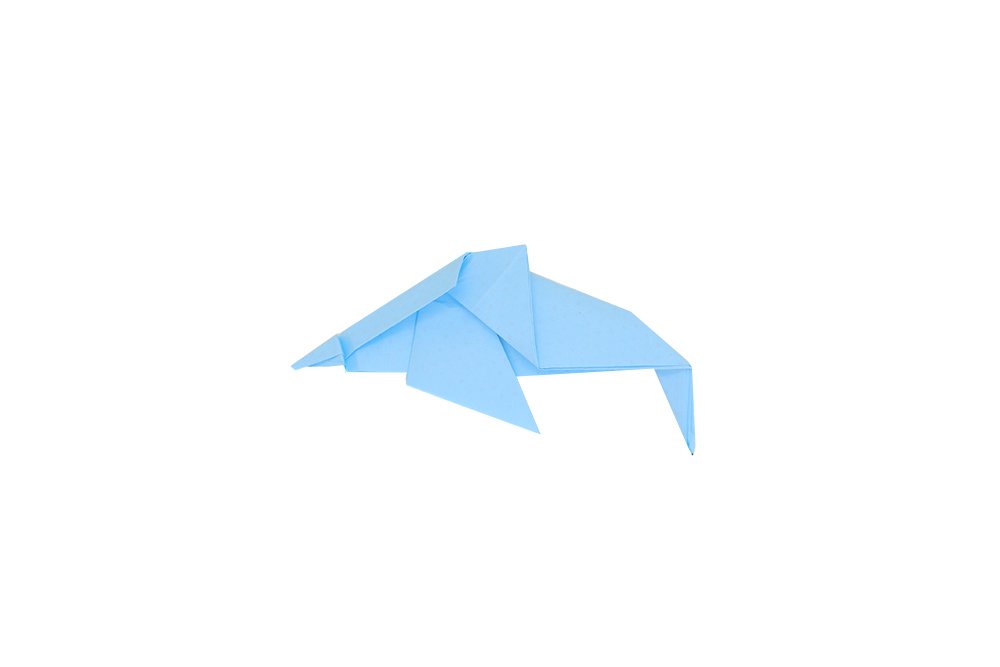
Then reverse fold only the inner layer of the tail upwards. To make a reverse fold, fold the tail’s top forwards the backward. Unfold it, then pry open the tip and flip it inside out.
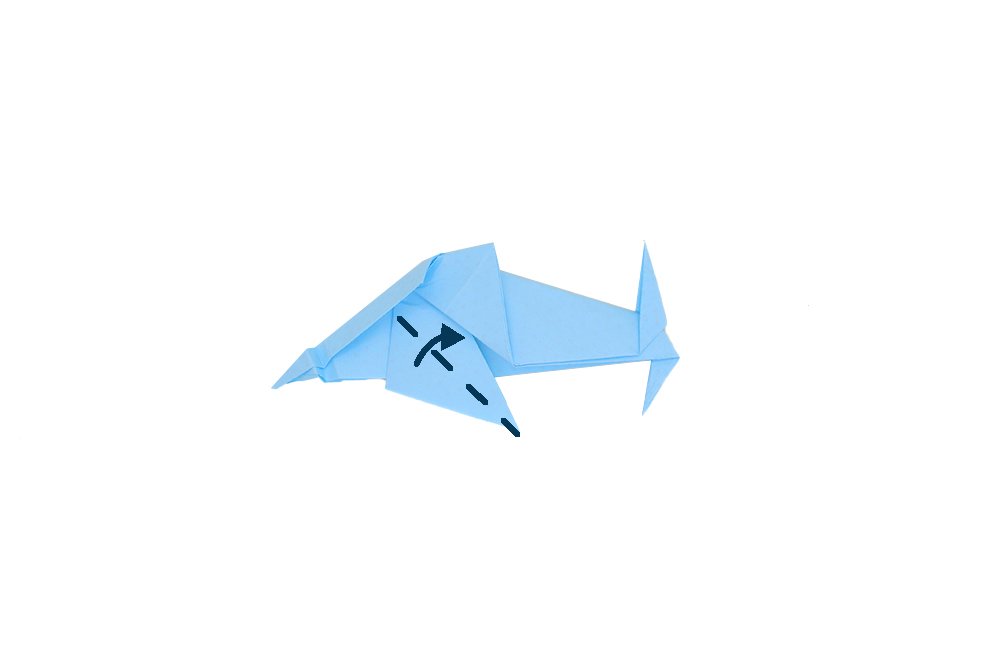
Make a valley fold to shape the dorsal fin. To make a valley fold, fold the lower side of the paper upwards. Use the dashed line for guidance.
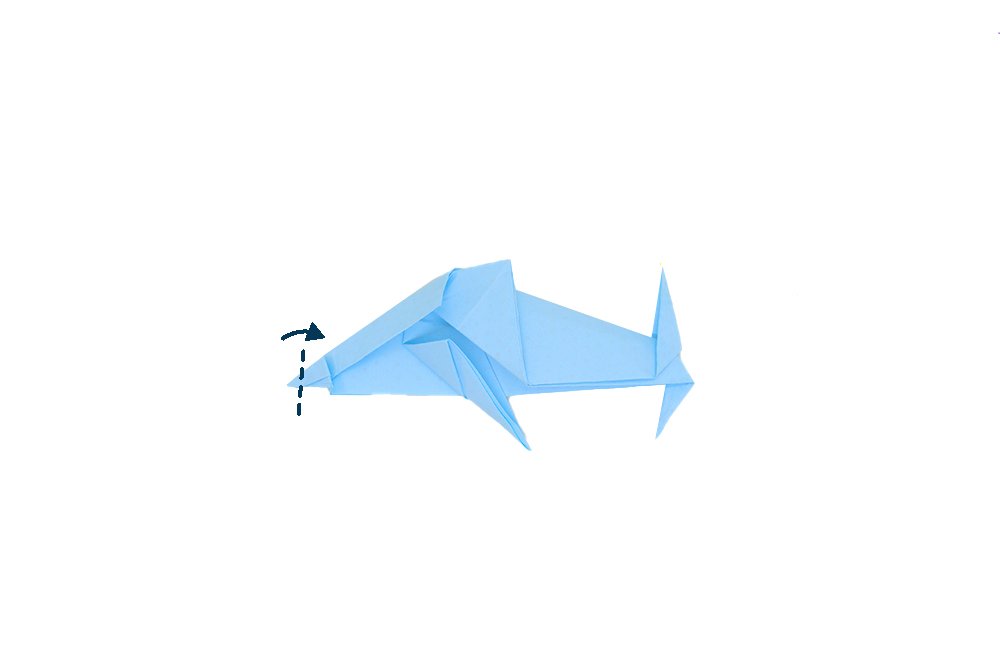
Create a small valley fold on the nose to make a curved shape. Then, fold the tip of the nose backward.
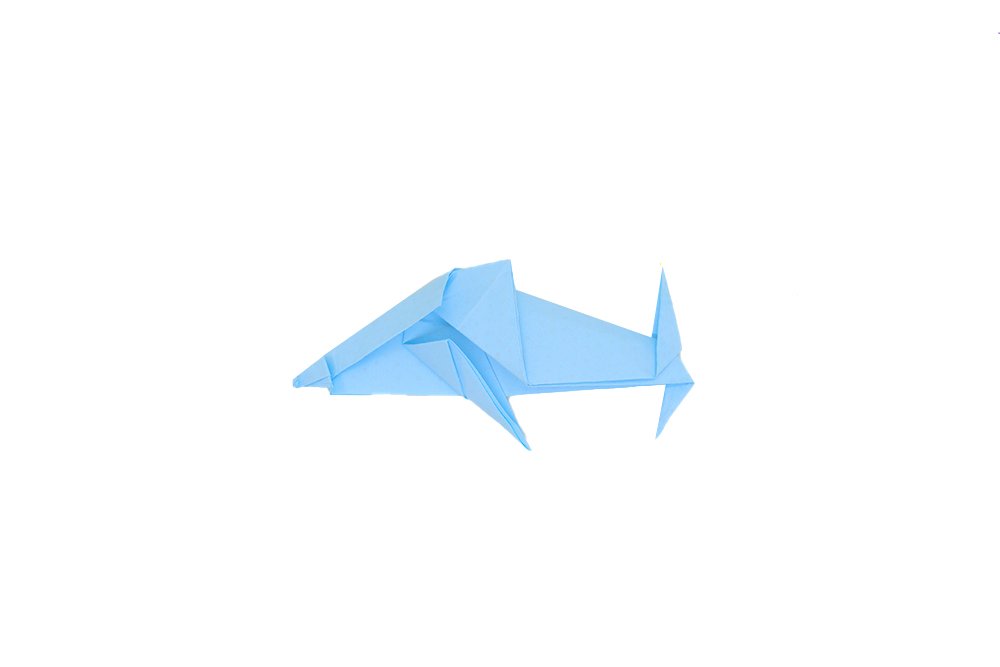
Your origami dolphin is almost done! Turn the paper around.
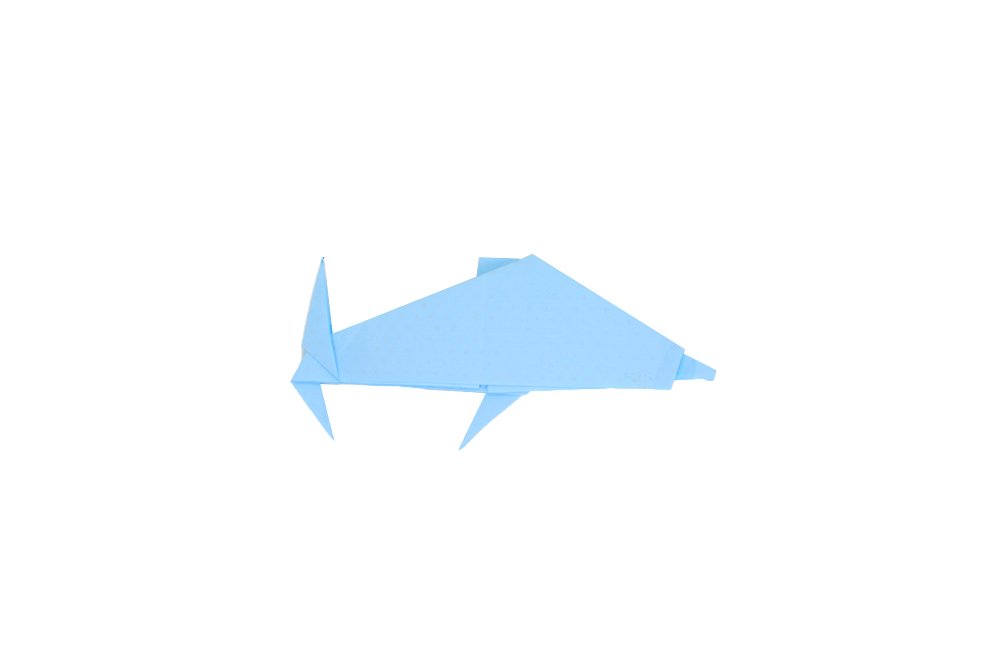
Your origami dolphin is done! Draw some eyes to your dolphin to give it some life. If you want to make some more sea friends.Click Here!
Extra Tips
- Take your time and be patient. Follow the steps closely but don't forget to have fun. Also, young kids should be supervised when using scissors.
- Fold straight and apply enough pressure. If you make mistakes and need another piece of paper, get another piece of paper. It simply won't look good if there are unnecessary crease lines.
- Get some art materials and make your origami whale even more beautiful.

 5
5
